66일차(1)/Android App(4) : Activity, Activity Life Cycle
- Activity의 정의, Manifests와의 관계
- 안드로이드앱의 생명주기(Activity Life Cycle)
[ Android App ]
- 하나의 App은 여러개의 Activity로 구성되어 있다.
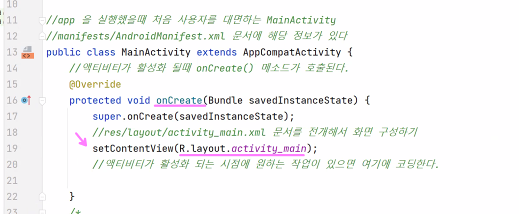
- 처음 App을 실행했을 때 첫 화면을 제어하는 MainActivity가 하나 있다.
- AActivity, BActivity, CActivity ... → 이 중 무엇을 운영체제는 알 수 없다. 어떤 액티비티를 첫 화면에 띄울지는 AndroidManifest 에 지정되어 있다.
- 앱이 활성화될 때 onCreate 메소드가 실행되고, R.layout.XX로 화면 구성을 한다.
- 그러면 액티비티 하나가 활성화되는 것이다.
- Step01Activity에 추가
SubActivity
package com.example.myandroid;

import android.os.Bundle;

import androidx.appcompat.app.AppCompatActivity;

public class SubActivity extends AppCompatActivity {

    @Override
    protected void onCreate(Bundle savedInstanceState) {
        super.onCreate(savedInstanceState);
        setContentView(R.layout.activity_sub);
    }
}
activity_sub.xml
<?xml version="1.0" encoding="utf-8"?>
<androidx.constraintlayout.widget.ConstraintLayout xmlns:android="http://schemas.android.com/apk/res/android"
    xmlns:app="http://schemas.android.com/apk/res-auto"
    xmlns:tools="http://schemas.android.com/tools"
    android:layout_width="match_parent"
    android:layout_height="match_parent">

    <Button
        android:id="@+id/button3"
        android:layout_width="wrap_content"
        android:layout_height="wrap_content"
        android:text="종료하기"
        app:layout_constraintBottom_toBottomOf="parent"
        app:layout_constraintEnd_toEndOf="parent"
        app:layout_constraintStart_toStartOf="parent"
        app:layout_constraintTop_toTopOf="parent" />
</androidx.constraintlayout.widget.ConstraintLayout>
AndroidManifest.xml (기본)
<?xml version="1.0" encoding="utf-8"?>
<manifest xmlns:android="http://schemas.android.com/apk/res/android"
    xmlns:tools="http://schemas.android.com/tools">

    <application
        android:allowBackup="true"
        android:dataExtractionRules="@xml/data_extraction_rules"
        android:fullBackupContent="@xml/backup_rules"
        android:icon="@mipmap/ic_launcher"
        android:label="@string/app_name"
        android:roundIcon="@mipmap/ic_launcher_round"
        android:supportsRtl="true"
        android:theme="@style/Theme.MyAndroid"
        tools:targetApi="31">
        <activity
            android:name=".MainActivity"
            android:exported="true">
            <intent-filter>
                <action android:name="android.intent.action.MAIN" />

                <category android:name="android.intent.category.LAUNCHER" />
            </intent-filter>

            <meta-data
                android:name="android.app.lib_name"
                android:value="" />
        </activity>
    </application>

</manifest>
manifest
- 모든 액티비티는 등록되어 있어야만 실행할 수 있다.
- 어떤 액티비티가 첫 화면을 구성할 것인지 정하는 것은 intent-filter
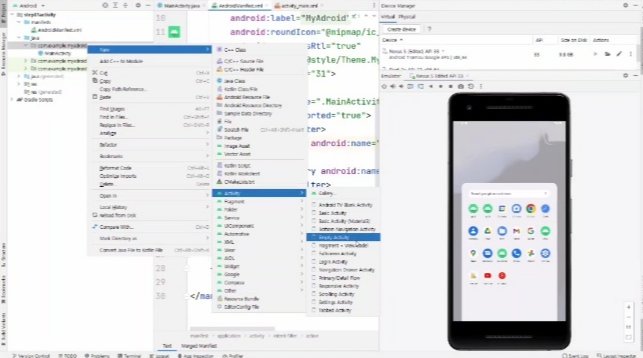
- new-Activity-Empty Activity
- 언어 java로 SubActivtity를 하나 생성!
- Activity가 2개 만들어졌다.
- res에 들어가보면 subactivity.xml 도 있다. 버튼을 하나 추가.
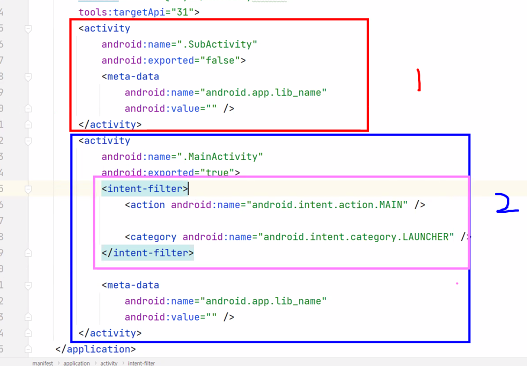
- 현재 main, sub 2개의 액티비티가 있는데, 두개의 모양 차이 비교
- Main에만 intent-filter가 있다.
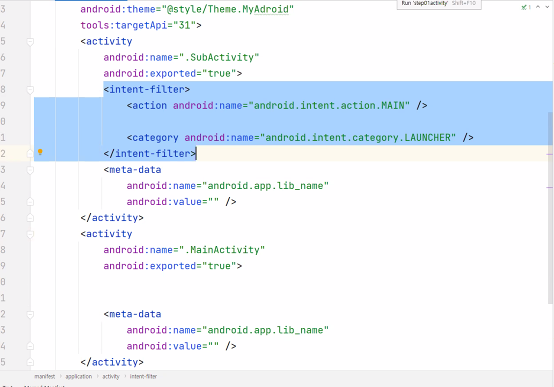
- 만약 intent filter를 서브에 끼워넣고 메인에서 지운다면?
- 이렇게 작성하고 앱 종료 후 다시 실행해보면
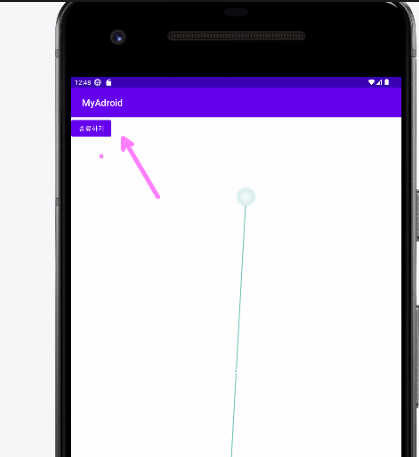
- 이제는 기본 페이지에 SubActivity 가 들어와 있다.
- UI 요소의 위치가 마음대로 배치되지 않을 경우,
제약조건을 맞추거나 infer constraints 를 눌러서 배치해주면 된다.

- <intent-filter> 를 이쪽으로 옮기면 서브 액티비티가 처음에 사용자를 대면하는 구조가 된다.
- intent-filter 의 역할과 구조 기억하기!
MainActivity
- java 소스에 클릭시 실행할 메소드를 만들어놓고 view 타입을 전달받도록 함
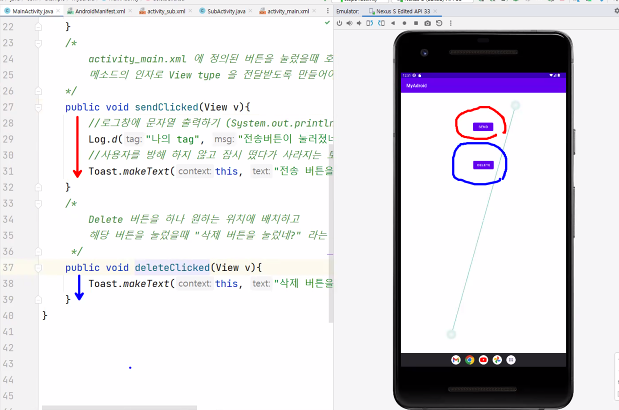
- 버튼을 만들고 버튼을 클릭하면 해당 메소드를 호출하도록 동작을 연결해둠
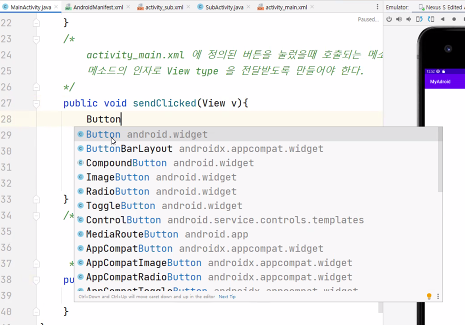
- android.widget 패키지의 버튼 요소
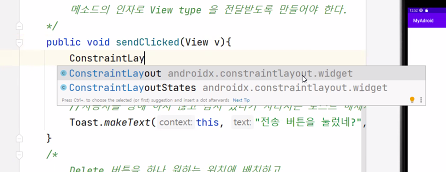
- androidx.constraintlayout.widget 패키지 에 들어있는 것을 볼 수 있다.
- 레이아웃 xml 파일에 있는 이 요소들이 모두 클래스로 존재한다.
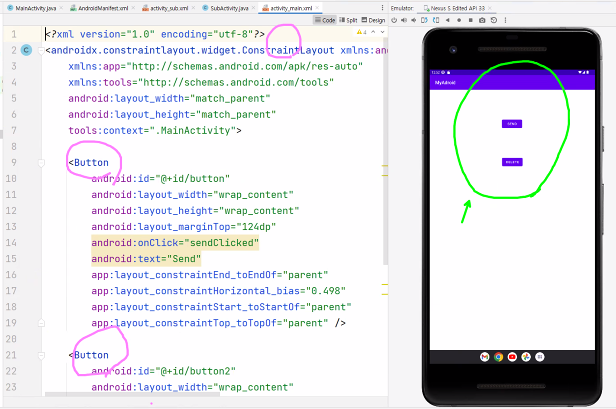
- 이렇게 화면이 구성되려면 레이아웃 1개, 버튼 2개의 객체가 필요하다.
- 이 코드에서 내부적으로는 new 하여 객체를 생성하는 작업이 일어나는 것이다.
- 레이아웃.xml 안에 나열되어 있는 모든 요소의 객체가 이 안에서 생성된다.
- 때로는 생성된 객체의 참조값이 필요할 때도 있다.
- 우리가 생성한 것은 아니지만 참조값을 사용하려 할 때, 어떻게 이 참조값을 얻어올까?
- html, js에서는 document.querySelector 을 사용했던 것처럼 객체 참조값을 얻어오기
- 메인액티비티 동작을 버튼에 연결하기 위해 view를 전달한다.
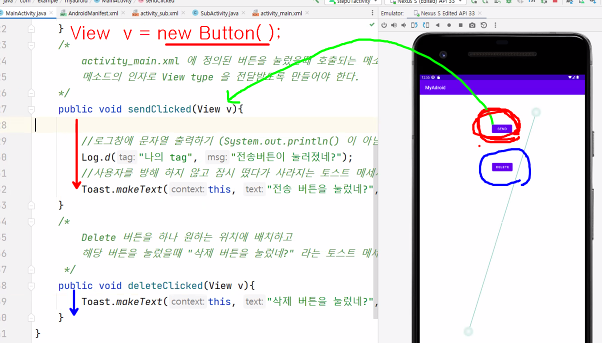
View v = new Button();
- 생성되었을 때 참조값이 이 메소드에 전달된 것이다.
- view가 버튼의 부모타입이기 때문에 여기서 부모타입으로 받는 것이 가능!
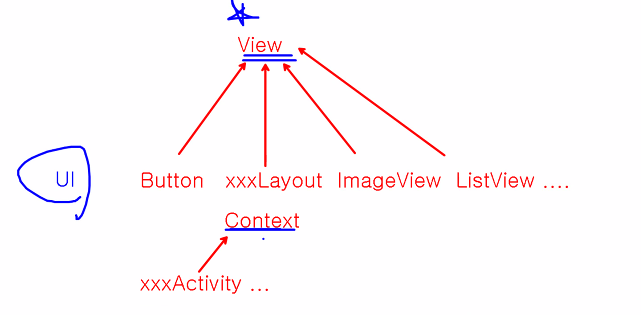
- 모든 UI는 부모에 view를 가지고 있다.
- 그리고 모든 액티비티는 부모에 context를 가지고 있다.
- 액티비티 안에서는 this를 전달한다.
- 하나의 액티비티는 여러개의 메소드로 구성될 수 있다.
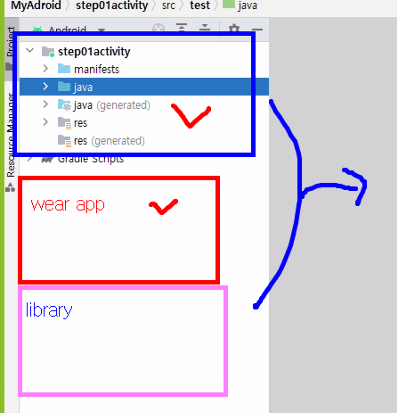
- 하나의 프로젝트 당 앱 하나이다.
- 만약 시계와 연동되는 앱이라면 밑에 Wear app을 추가로 만들어야하고, 라이브러리도 필요하다면 만들어놓아야한다.
- 이렇게 묶어서 하나가 하나의 앱이라고 보면 된다.
- 지금은 연습이므로 하나의 프로젝트에 여러개의 모듈을 만들 것!
- 새 모듈 추가하기
(원래는 앱 하나에 하나의 모듈을 만드는 것이 정상적이다.)
File-new-New Module
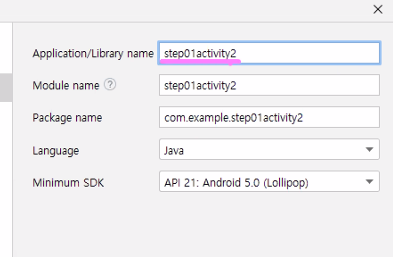
- Empty Activity로 선택
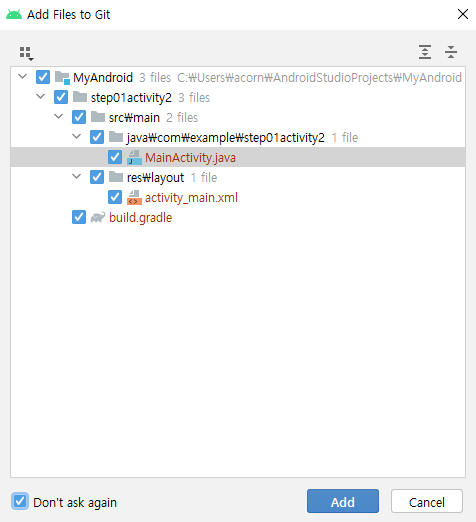
- 깃을 추가하겠냐는 질문인데 그냥 add 하면 된다.
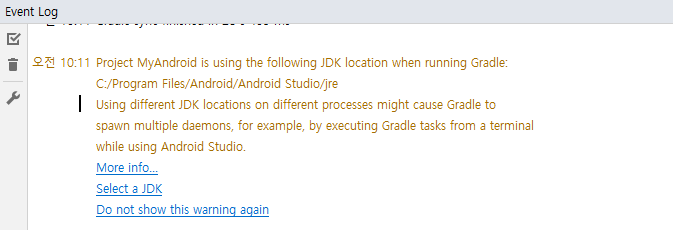
- 만약 콘솔창에 이런 문제가 발생했을 경우
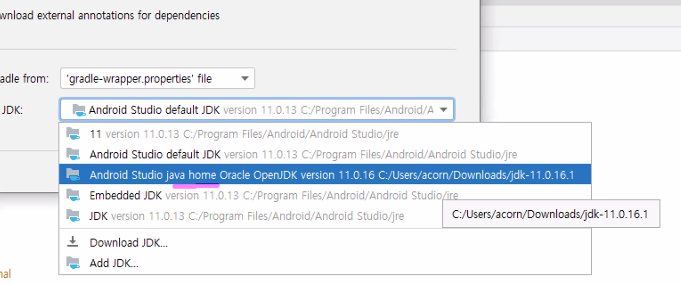
- 안드로이드에도 자체 자바가 있다. 문제가 생기면 이 java를 바꿔봐도 좋다.
- 이전에 잡아놓은 java home 선택해보기
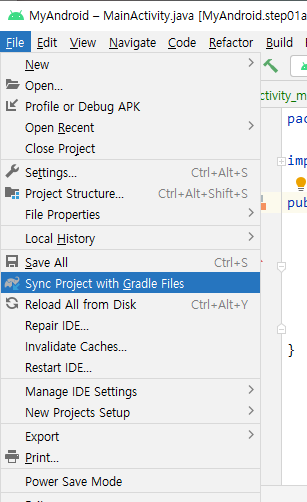
Sync Project with Gradle Files
- 뭔가 초기화가 덜 된것 같으면 이것도 해주기...
MainActivity
package com.example.step01activity2;

import androidx.appcompat.app.AppCompatActivity;

import android.os.Bundle;
import android.util.Log;

public class MainActivity extends AppCompatActivity {

    @Override
    protected void onCreate(Bundle savedInstanceState) {
        super.onCreate(savedInstanceState);
        setContentView(R.layout.activity_main);
        Log.d("MainActivity","onCreate() 호출됨");
    }

    @Override
    protected void onStart() {
        super.onStart();
        Log.e("MainActivity","onStart() 호출됨");
    }

    @Override
    protected void onRestart() {
        super.onRestart();
        Log.e("MainActivity","onRestart() 호출됨");
    }

    @Override
    protected void onResume() {
        super.onResume();
        Log.e("MainActivity","onResume() 호출됨");
    }

    @Override
    protected void onPause() {
        super.onPause();
        Log.e("MainActivity","onPause() 호출됨");
    }

    @Override
    protected void onStop() {
        super.onStop();
        Log.e("MainActivity","onStop() 호출됨");
    }

    @Override
    protected void onDestroy() {
        super.onDestroy();
        Log.e("MainActivity","onDestroy() 호출됨");
    }
}
activity_main.xml
<?xml version="1.0" encoding="utf-8"?>
<androidx.constraintlayout.widget.ConstraintLayout xmlns:android="http://schemas.android.com/apk/res/android"
    xmlns:app="http://schemas.android.com/apk/res-auto"
    xmlns:tools="http://schemas.android.com/tools"
    android:layout_width="match_parent"
    android:layout_height="match_parent"
    tools:context=".MainActivity">

    <EditText
        android:id="@+id/editTextTextPersonName"
        android:layout_width="wrap_content"
        android:layout_height="wrap_content"
        android:layout_marginStart="71dp"
        android:layout_marginBottom="310dp"
        android:ems="10"
        android:hint="메세지 입력..."
        android:inputType="textPersonName"
        android:minHeight="48dp"
        android:textSize="30sp"
        app:layout_constraintBottom_toBottomOf="parent"
        app:layout_constraintStart_toStartOf="parent" />
</androidx.constraintlayout.widget.ConstraintLayout>
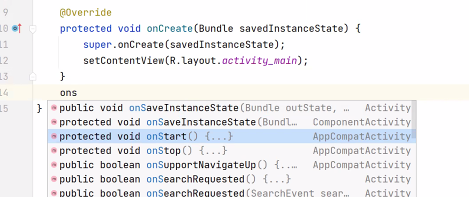
- onStart , onRestart, onResume, onPause, onStop, onDestroy 메소드 오버라이드
(ctrl+space로 자동완성시키면 된다)
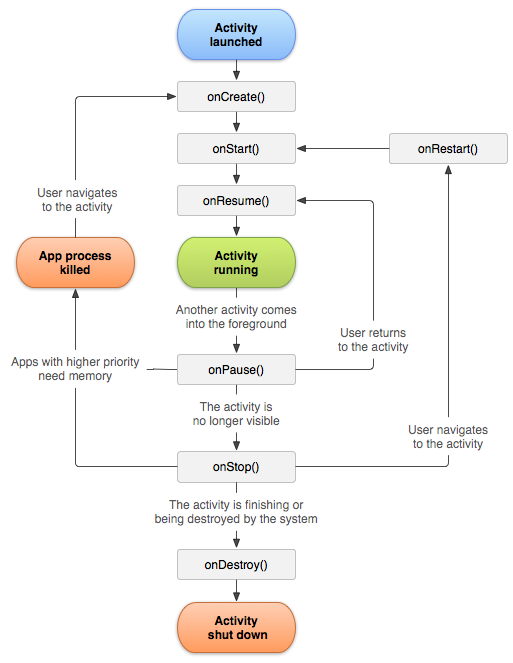
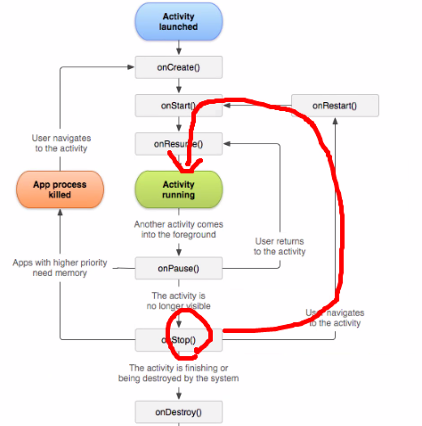
- 안드로이드 문서에서 보면 Activity life cycle 이 있다.
* 주기 관련 설명 : 링크
onCreate() → onStart() → onResume()
- 이 메소드들을 거쳐서 액티비티가 활성화된다.
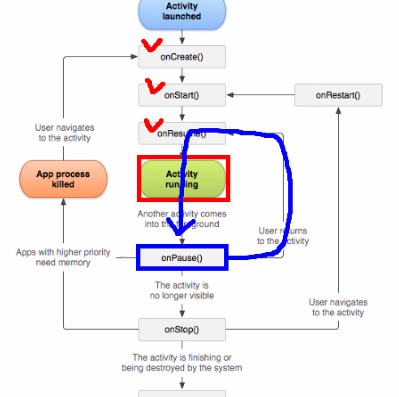
onPause() : 앱을 잠시 정지시키는 기능
- 휴대폰을 사용하던 중 뭔가 알림창이 떴을 때 pause가 호출되고, 다시 resume을 거쳐서 재활성화된다
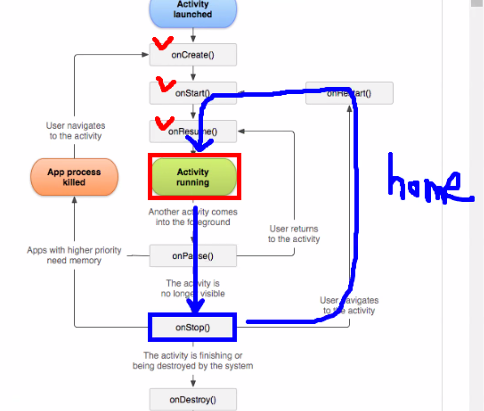
- home버튼을 누르면 onStop() 으로 내려왔다가 onRestart() 를 거쳐서 다시 재실행된다.
- 이 구조를 보면, 앱이 활성화된다고 해서 무조건 onCreate() 가 호출되는 것은 아니다.
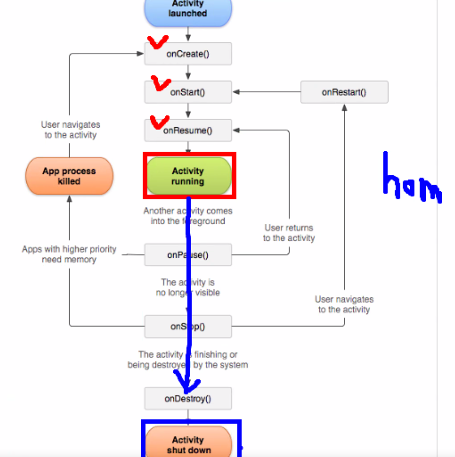
- 한편 back 버튼을 누르면 앱이 완전히 셧다운된다.
- 백 버튼으로 종료하고 다시 활성화시킬 경우에는 onCreate() 부터 시작된다.
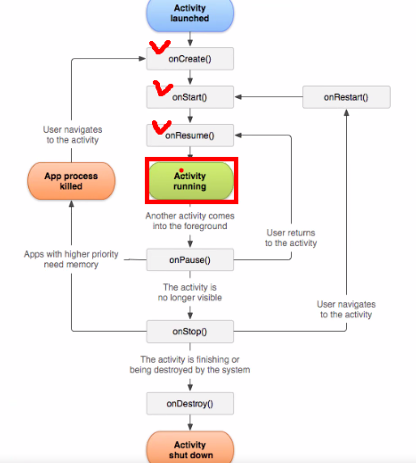
- 이 메소드들이 잘 호출되는지 확인하기 위해, 메소드마다 로그를 출력하는 한줄을 넣은채로 활성화해보기!

- 활성화하면 이렇게 호출된 메소드가 표시된다.
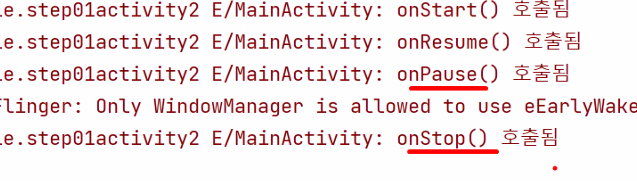
- home 버튼 클릭시의 상황. pause → stop
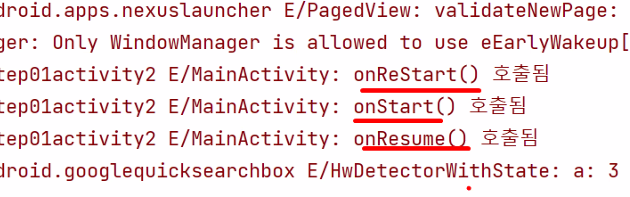
- 앱에서 나갔다가 재활성화하면 onCreate가 아니라
onRestart → onStart → onResume을 거쳐서 활성화된다.
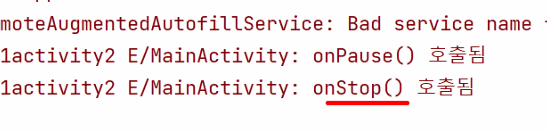
- 백 버튼 누르면 onPause → onStop
- 원래는 백 버튼으로 종료하면서 onDestroy까지 내려갔는데,
안드로이드 버전이 올라가면서 프로세스 보기가 생겨서
백버튼이면 onStop에 머물러있다가 다시 활성화되는 것으로 바뀌었다.
- onStop에 머물러 있는 이유는? 필요하면 남아있는 프로세스 목록에서 되살리려고!
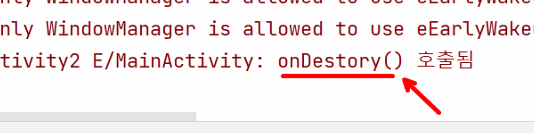
- 프로세스 목록에 들어가서 완전히 지우면?
- 이제야 onDestroy 가 호출된다.
- Activity 생명 주기가 중요한 이유!!
- 뭔가 작업을 하다가 전화가 왔을 때, 작업 데이터가 삭제되지 않고
onStop에 잠시 머물러있다가 다시 활성화될 수 있도록 해준다.
- pause에서 일시정지하고 나서 onRestart 에서 다시 시작하게 해주면 된다.
- 작업이 다시 시작되는 시점을 정해서 onStop → onRestart 를 거처서 돌아오게 하면 된다.

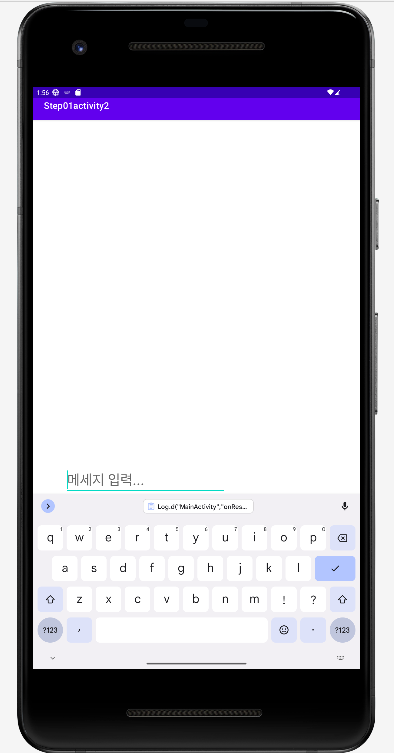
- plain text 요소 배치해주기.
- 오류 발생시(좌하단 빨간 느낌표) 오류 메시지에서 fix 눌러줌
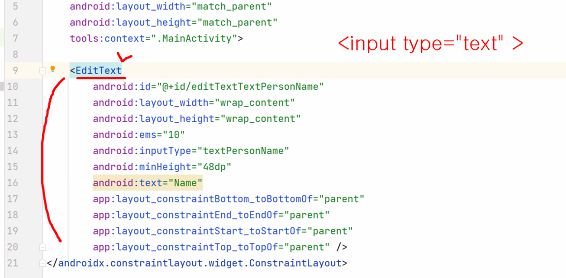
- code에서 확인해보면 이 요소가 추가되었다.
- 안드로이드의 <EditText> 는 html의 <input type="text"> 라고 보면 된다.
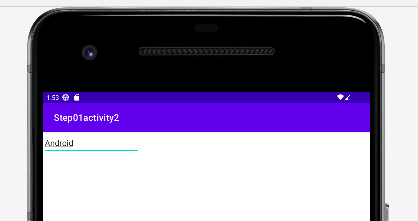
- run 하고 포커스를 가져다 대면 들어가 있는 내용을 수정할 수 있다.
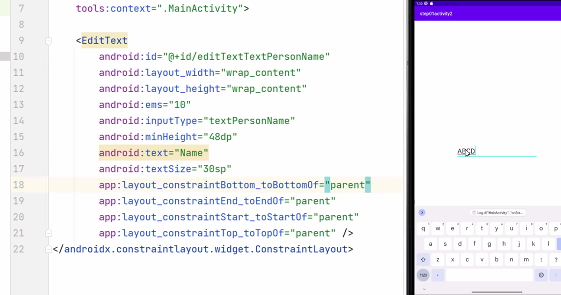
- 텍스트 크기 키우기.
- 텍스트 크기의 단위는 sp 단위를 쓴다. (화면 크기와 상관없이 동일한 크기를 가진다.)
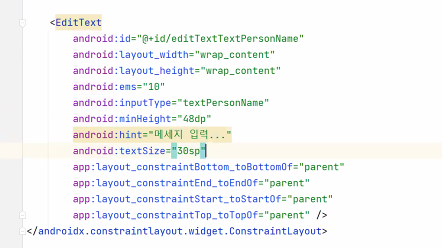
- text빼고 hint로 바꿔준다. 속성 수정!
- 안드로이드에서 hint는 input 요소의 placeholder의 역할
- 입력하다가 홈버튼으로 나갔다가 다시 화면에 띄우면 이 값은 일부 남아있다.
- 하지만 onDestroy 했다가 다시 실행하면 입력하던 값은 완전히 사라져 있다. 앱이 완전히 종료되었던 것!
- 해당 앱에서 벗어났을 때, 메모리가 부족해서 운영체제가 강제로 종료해야 하는 상황이 아니면
보통은 onStop() 상태에 계속 머물러 있다. 따로 종료하거나 정리하지 않는 이상!
- 안드로이드 앱 생명 주기를 잘 외워두기!
'국비교육(22-23)' 카테고리의 다른 글
| 66일차(3)/Android App(6) : Linear Layout 예제 (1) | 2023.01.11 |
|---|---|
| 66일차(2)/Android App(5) : Android Studio 에서 git 관리하기 (0) | 2023.01.11 |
| 65일차(2)/Android App(3) : Button, Toast 메시지 (1) | 2023.01.10 |
| 65일차(1)/Android App(2) : 주요 파일 구성 및 Layout 익히기 (0) | 2023.01.09 |
| 64일차(2)/Android App(1) : Android Studio 설치, 초기 세팅, 기초 (0) | 2023.01.06 |